

Water Damage Restoration Checklist for Bellevue, WA Homeowners
Bellevue Water Damage Guide · Step-by-Step Checklist · Updated July 2026
Water Damage Restoration Checklist
for Bellevue, WA Homeowners
Everything you need to do — in the right order — from the moment water damage occurs to IICRC clearance. Bellevue-specific steps for insurance documentation, galvanized pipe events, and Kelsey Creek flood zone homeowners.
How to Use This Checklist
Organized in strict priority order. Steps 1–3 happen in the first 10 minutes. Steps 4–6 happen in the first 30 minutes. Steps 7–13 happen during restoration. Do not skip ahead — order matters for safety and your insurance claim.
Water damage unfolds fast. In Bellevue’s Oct–Mar atmospheric river season, you have 20–24 hours before mold begins colonizing wet materials. The decisions you make in the first 60 minutes determine your total remediation cost, your insurance settlement, and whether you end up with one problem (water damage) or two (water damage + mold).
Before You Start — Critical Rule
Do NOT run fans, HVAC, or household dehumidifiers. Fans push moisture deeper into wall cavities. HVAC spreads contaminated air to other rooms. These actions increase your remediation scope and may void insurance coverage for the additional damage caused.
First 10 Minutes — Safety & Source
Shut off the water source immediately
Turn off the main shutoff valve — garage, utility room, or near your water meter. In Crossroads and Lake Hills homes, check the crawl space access panel. Cannot find it? Shut off at the street meter. Appliance event? Unplug the unit.
Cut power to affected rooms at the breaker panel
Switch off electricity to every room with standing water. Do not enter a flooded room if outlets are at floor level until power is confirmed off. If the breaker panel is in an affected room, call your utility first.
Take timestamped photos and video of everything
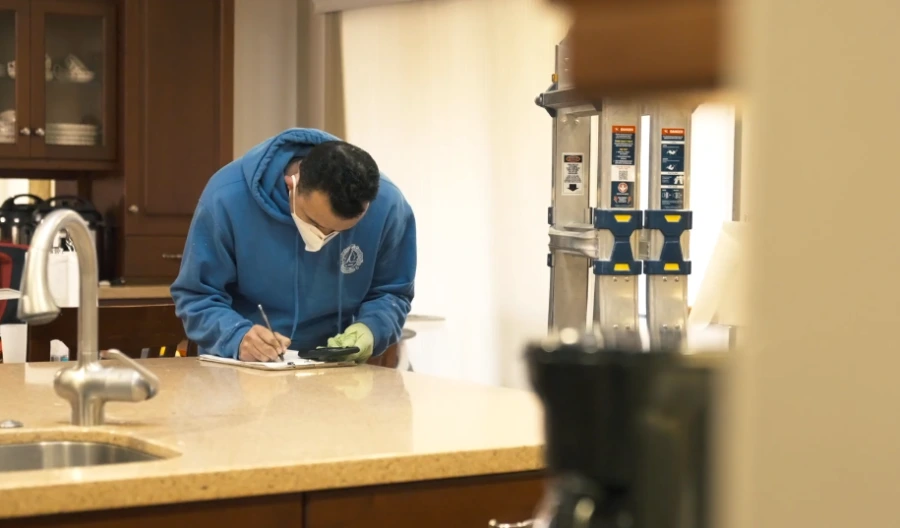
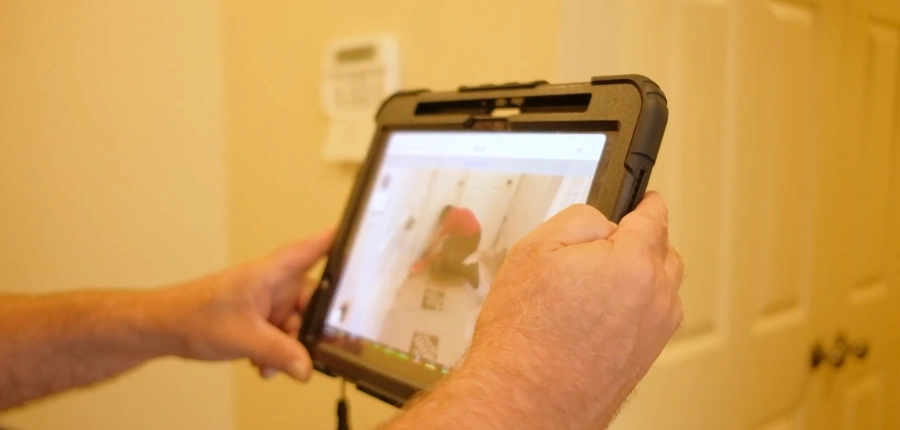
Before touching anything: photograph all affected areas, water level marks on walls, the source point, and all visible damage. Video walkthrough is better than photos alone. These timestamps are your primary WA duty-to-mitigate compliance evidence.
Do NOT start cleanup yet
Do not mop, blot, or vacuum water. Do not remove wet rugs, furniture, or materials. Any change to the scene before professional documentation compromises your insurance claim.
First 30 Minutes — Calls & Documentation
Call us before your insurance company — (425) 920-1919
WA duty-to-mitigate requires immediate action. Waiting for an adjuster violates this and gives your carrier grounds to reduce your settlement. Give us: your address, the source, and whether it is stopped. We dispatch within minutes, on-site within 60 minutes.
Kelsey Creek/Mercer Slough flood zone note
If the source is rising groundwater rather than interior plumbing, mention this. It affects coverage determination and our scope approach.
Locate your insurance documents
Find: insurance card, policy declarations page (deductible and coverage limits), insurer claims phone number. Common Bellevue carriers: State Farm, Safeco, Allstate, Farmers, USAA. Do not call them yet — wait until we have thermal imaging complete.
Move valuables to a dry area — photograph in-place first
Photograph all damaged items before moving them. Electronics, artwork, documents, and sentimental items can move to a dry room after photographing. Personal property damage is a separate insurance line item — document everything before it moves.
Crew On-Site — What Happens & What You Do
Allow thermal imaging before any work begins
First 30–60 minutes on-site is thermal imaging and moisture mapping. FLIR cameras find moisture 8–12 feet beyond visible wet zones inside wall cavities. This creates your Day 1 evidence package — satisfies WA duty-to-mitigate, establishes claim scope, and is the evidence your adjuster uses to approve equipment fees. Do not rush this step.
Review and approve the written scope before work starts
After thermal imaging we produce a written scope: affected areas, materials, equipment, drying timeline, and cost estimate. Read it. Ask questions. Nothing starts until you sign. For insurance jobs this scope becomes your Xactimate. No scope changes without your approval.
Call your insurance company with documentation in hand
Now — with thermal imaging report and written scope — call your insurer to open the claim. Reference: event date/time, source (burst pipe, appliance, etc.), restoration company contact for adjuster communication. We handle direct adjuster contact from this point.
Galvanized pipe note (Crossroads & Lake Hills)
Tell your adjuster: “sudden and accidental pipe failure.” Do not say “slow leak” or suggest prior knowledge of the pipe condition. Our thermal documents acute event pattern vs. gradual accumulation.
During Drying — Days 2 Through Clearance
Save your daily moisture readings (texted to you each day)
We text moisture readings from every measurement zone daily. Save every message. They are your proof that drying progressed and equipment ran as documented. If your adjuster disputes equipment days, these timestamped readings are irrefutable. In Bellevue’s Oct–Mar season, drying takes 4–12 days.
Do not remove drying equipment early
Do not unplug, move, or remove equipment before IICRC S500 clearance. Early removal leaves moisture in walls that causes mold 3–6 months later inside the rebuild. It also voids the drying documentation justifying your insurance reimbursement. Call us if you have concerns.
Keep a personal incident log
Log every insurer conversation: date, time, rep name, what was said. Note adjuster visit dates. Note claim decisions. This log is your evidence if your insurer delays beyond Washington’s 10/15 business day legal deadlines or a bad faith dispute arises under RCW 48.30.015.
Wait for written IICRC clearance before hiring rebuild contractor
Rebuilding before moisture reaches IICRC S500 pre-loss baseline traps moisture inside new walls, leading to mold within months. We issue a written clearance report when all zones reach Bellevue’s regional EMC baseline (8–13% for wood materials). Your general contractor should require this before touching the rebuild.
Insurance Documentation Checklist
☐ You Collect
- Timestamped photos before any cleanup
- Video walkthrough of all affected areas
- Insurance card and declarations page
- Claim number from insurer
- Daily moisture text messages (save all)
- Emergency expense receipts (ALE)
- Notes from every insurer conversation
- Adjuster name, visit date, contact info
✓ We Produce for You
- Thermal imaging report (Day 1)
- Moisture baseline at all zones
- Daily psychrometric logs
- Full Xactimate scope
- Equipment documentation
- Antimicrobial treatment records
- IICRC S500 clearance report
- Mold clearance (when applicable)
Bellevue-Specific Notes
🏠 Crossroads & Lake Hills — Galvanized Pipe Failure
When reporting to your insurer, say “sudden pipe failure” not “old pipe leak.” Our thermal imaging documents the acute event pattern vs. gradual accumulation. Do not discuss pipe age with your adjuster before we have produced our thermal report.
🌿 Kelsey Creek & Mercer Slough Flood Zone
Rising groundwater entry is flooding — requires NFIP coverage, not standard homeowners. Call us first; we identify the source and advise on which policy applies before you open any claim.
🏢 Downtown Bellevue Condo & HOA Events
Do NOT call your HOA until we have thermal imaging complete and source documentation ready. Under RCW 64.34, liability follows source. Our report resolves most disputes before they escalate.
Checklist FAQs
What is the single most important step in this checklist?
Step 4 — calling a restoration company before your insurance company. Washington State’s duty-to-mitigate doctrine means delaying extraction while waiting for an adjuster gives your insurer legal grounds to reduce your settlement. Our 60-minute response creates the timestamped record that you took immediate, reasonable action.
What if water damage occurs in the middle of the night?
Follow this checklist in the same order. We answer 24 hours a day, 365 days — a live person at 2am. Shut off water, cut power, photograph, then call us. Do not wait until morning. In Bellevue’s humid winter conditions, a 6-hour delay significantly increases remediation scope.
What if I already ran fans or started cleaning?
Stop immediately and call us. Fans are a common mistake — we handle the consequences regularly. Thermal imaging can still establish the original event scope. The sooner you call, the better. Do not continue DIY efforts.
How long does the complete process take in Bellevue?
Extraction: 1–4 hours. Structural drying: 3–14 days (longer Oct–Mar). Insurance approval: 2–4 weeks with our Xactimate. Rebuild: 2–12 weeks after clearance. Total from event to move-back-in: typically 4–16 weeks for covered insurance jobs.
Related Pages
More From Water Damage Restoration Bellevue WA
What To Do Immediately
First steps before our crew arrives — stop the bleeding.
Emergency Response
60-minute dispatch for all Bellevue ZIP codes, 24/7.
Water Extraction
Step 1 of the restoration process — truck-mounted extraction.
Structural Drying
Step 2 — IICRC S500 drying to clearance standards.
Insurance Claims
How to document your claim through every step of restoration.
Mold Prevention Timeline
Why checklist order matters — mold starts in 20–24 hours.
Water Damage Right Now?
Call First — We Handle Everything Else
Live person answers 24/7. On-site within 60 minutes. Extraction, drying, thermal documentation, insurance communication — all handled.
IICRC WRT + ASD Certified · WA License #NATIORC792M6 · 15700 Bel-Red Rd, Bellevue WA 98008 · [email protected] · 24/7/365